
Before the era of screenshots, nobody thought a tool that lets you capture exactly what’s shown on your screen can be so simple and yet so handy. This article shows you two ways to take a screenshot on your Dell laptops and computers.
But, if you want to jump to the best solution for taking screenshots and adding handy annotations like arrows, boxes, comments and highlights, then:
PRO TIP: Click Here to Skip Directly to our Recommendation!
What is a Screenshot?
Screenshot, screengrab, or screencap - whatever you call it, is an image of exactly what’s displayed on your desktop screen. One can practically go on and on about the usefulness of screenshots in this modern age of computers. We all knew that a picture is more engaging and meaningful than a lengthy paragraph, and the evolution of screenshots is yet another testament to just that.
Let’s say you want feedback from your colleagues about this new web page you designed. Or maybe you want them to take a look at that digital flyer you’ve crafted. Your colleagues could take a look at it and jot down all the changes and improvements that can be made. Alternatively, they could just take a screenshot, mark the places that need edits, and send it over. The latter would be far simpler and a lot more efficient.
Screenshots also come in handy while reporting an issue. You may often find IT or Web Support teams asking for a screenshot when you report a problem. When you provide a screenshot, it becomes a lot easier for the support team to understand exactly what’s going on and how to fix it.
But that’s not all. Let’s say you’re forming an instruction manual for your team. All you need to do is take a few screenshots and show them exactly how it’s done. Why waste time and energy on writing a verbose paragraph when you can simply mark and annotate your snapshots to guide them through?
That being said, a screenshot is an amazing resource for both personal and professional use. If you’re using a Dell laptop or computer and you’re not sure how you can capture your screen on a Dell device, read on.
How To Take A Screenshot On Dell Laptops And Computers
There are several easy ways to take a screenshot on your Dell device. Regardless of your laptop model or series, the following methods will work for every one of them. Here’s how to take a screenshot on Dell Laptops and computers.
Method - 1: The Print Screen (Prt Sc) Combos
The exact label may vary from one model to another, but Dell laptops usually mark the Print Screen key as ‘Prt Sc’. Also marked as F10, you’ll find this key in the top row of your keyboard. On some Dell models, this key will be located beside the ‘Delete’ key.
Using certain keyword combinations with the Print Screen key, you can capture your screen in different proportions. This method will work perfectly on Windows 8, Windows 8.1, and Windows 10. Here’s how you do it:
- If you want to capture the entire screen at one go, press the Windows key and Prt Sc key simultaneously. Your screen will flicker for a second, meaning that it has successfully taken a screenshot.
- If you’d like to capture a single active window, all you need to do is click on the window you want to take a snapshot of and then press Alt + Prt Sc simultaneously.
- Lastly, if you want to take a screenshot of all active windows, simply press Prt Sc.
Where Is The Screenshot Folder Located?
Once you have taken a screenshot on your Dell laptop, the image will be copied to your clipboard. Paste it on a graphics editing tool (such as Microsoft Paint) and click on Save.
Method - 2: Screenshot with Snipping Tool on Dell Laptop
If you want to opt for a different option, you can use the Snipping Tool instead. This is a built-in Windows feature that allows you to capture your screen in different shapes. To go to the Snipping Tool, click on the Start Menu and type ‘Snipping Tool’ in the search section. The application will appear with a variety of options at your disposal.
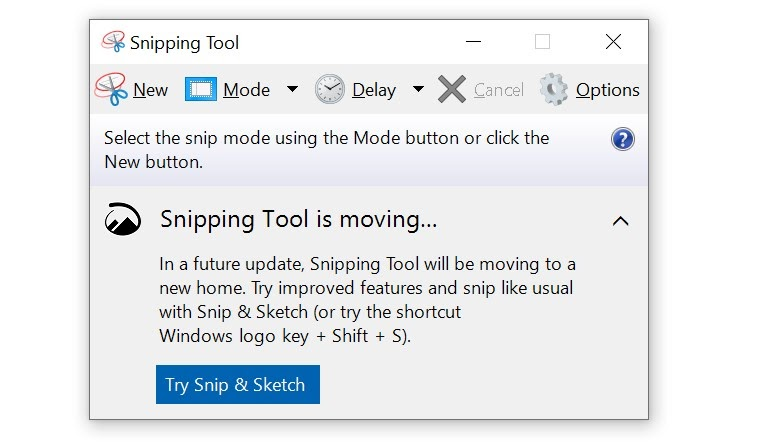
Select ‘New’ or press ‘Ctrl + N’ together. Choose the shape in which you want to capture your screenshot. The rectangular snip is the default option. Three other forms include:
- The Free Form Snip: This feature facilitates capturing your screen in any shape you want to.
- The Window Snip: The Window Snip lets you capture your active windows with one simple click.
- The Full-Screen Snip: The Full-screen Snip captures the entire screen at once. This feature will be particularly handy if you’re using multiple monitors.
Once you’ve taken your snapshot, press ‘Ctrl + S’ to save the image in your desired location.
Better Alternative: Take A Screenshot On Dell Using Markup Hero
If you want to go for an option that offers a richer variety of features for you to work with, you should definitely use Markup Hero, a simple yet powerful application that not only enables you to take screenshots but also edit and annotate them on the go. You can capture thoughts and ideas, mark them, and share them with your friends and colleagues. Additionally, you can add tags, sort your images, and organize them using separate folders. (These features are particularly valuable for teams collaborating on software development outsourcing services, as they enable efficient communication and project management across different locations and time zones.) You can also upload these images on the web. This helps establish a clear line of communication and speeds up workflow.
Here’s how you can take a screenshot on Dell laptops and computers using Markup Hero:
Downloading Markup Hero
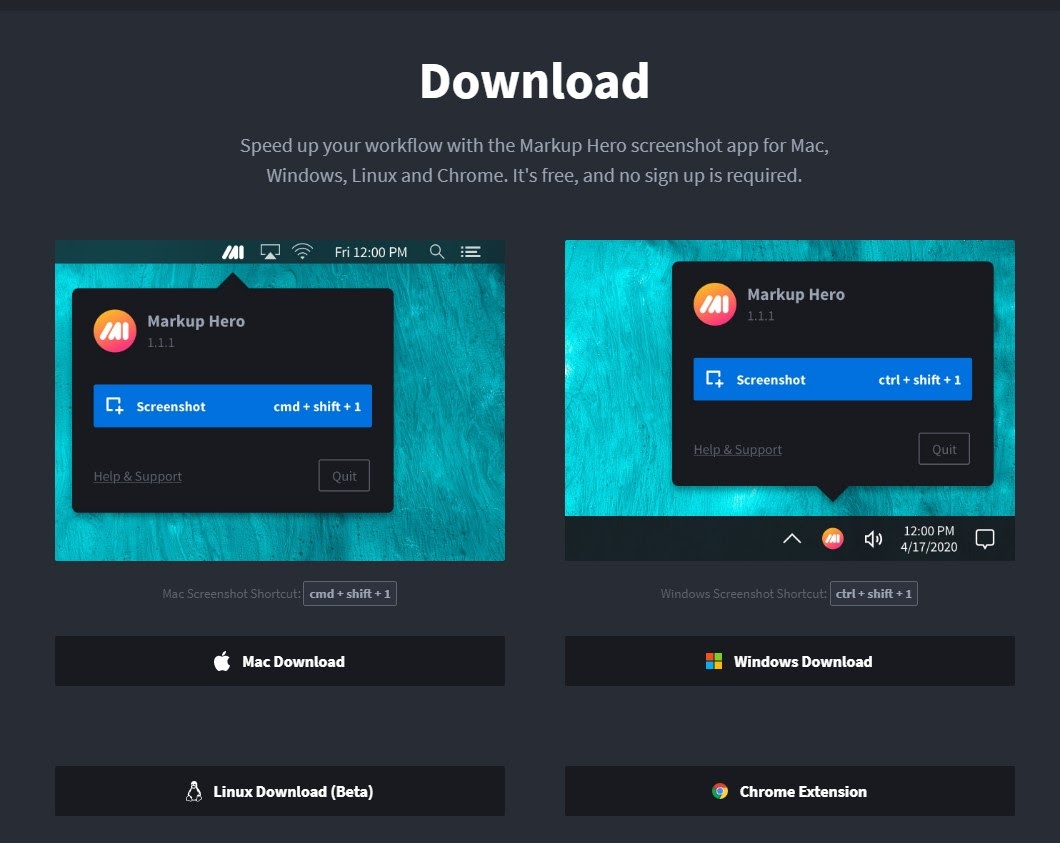
At first, you will need to download the Markup Hero app. It’s free and you don’t even need to sign up anywhere. Markup Hero works perfectly well on all the major operating systems including Windows, Chrome, Mac, and Linux.
Installing Markup Hero
Once you have downloaded Markup Hero, go to the ‘Downloads’ section of your laptop/computer and double-click on the .exe file to start the installation process.
That’s it. No more setup required. Just press Ctrl + Shift + 1 together to start the application.
How Markup Hero Works
With the help of Markup Hero, you can take a screenshot of a portion or the entirety of your screen. Once you’ve taken your screenshot, this tool will upload the image on the web. You can use the features Markup Hero offers to annotate, highlight, and edit your image.
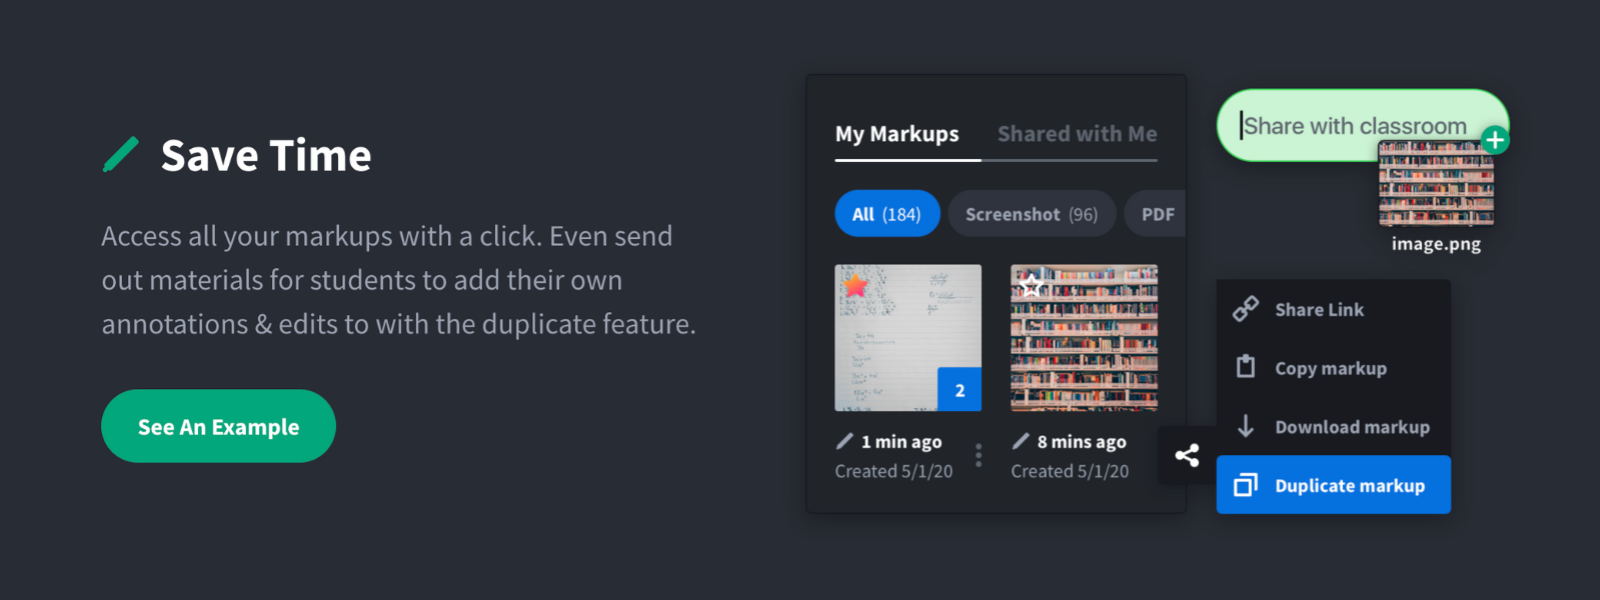
You'll save a ton of time with Markup Hero because you can organize all your screenshots for later access. Even edit and update your annotations. Use tags quick find what you are looking for.
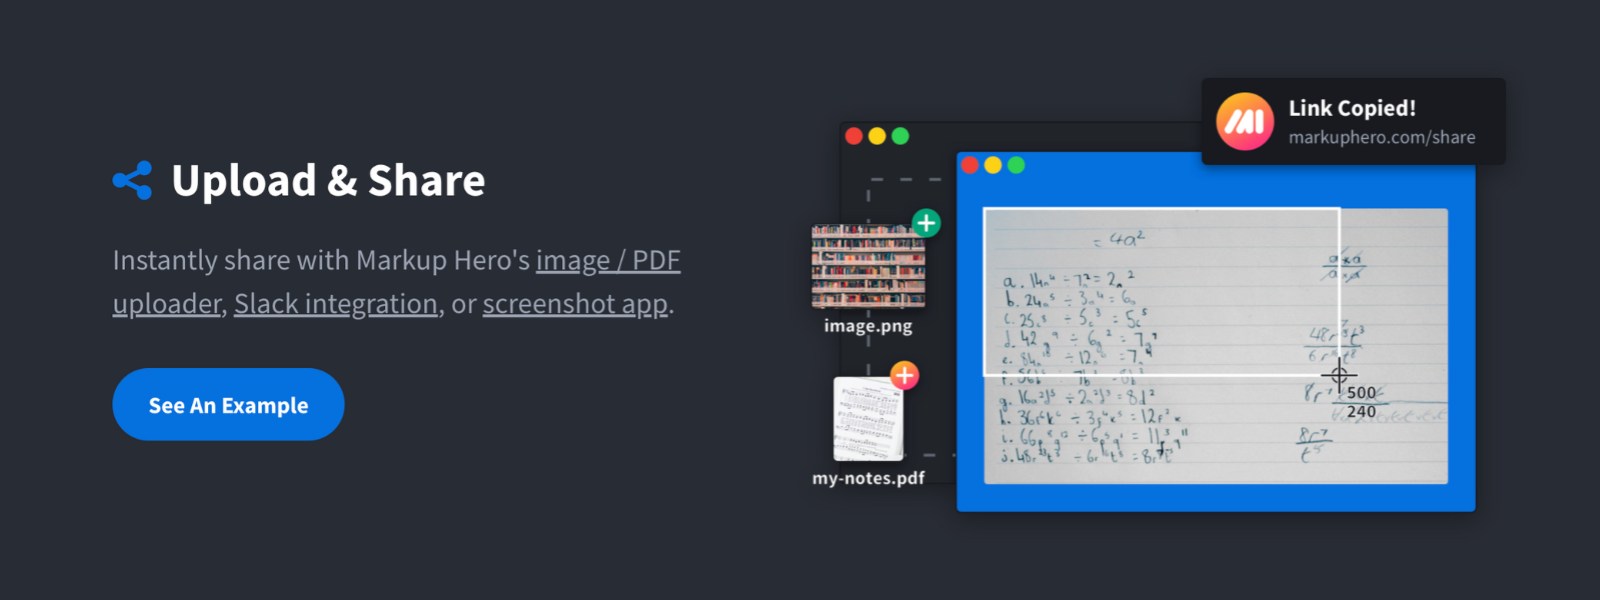
Ready to share? Just download, copy and send your markups to friends. Click the share button and export to PDF or copy a link.
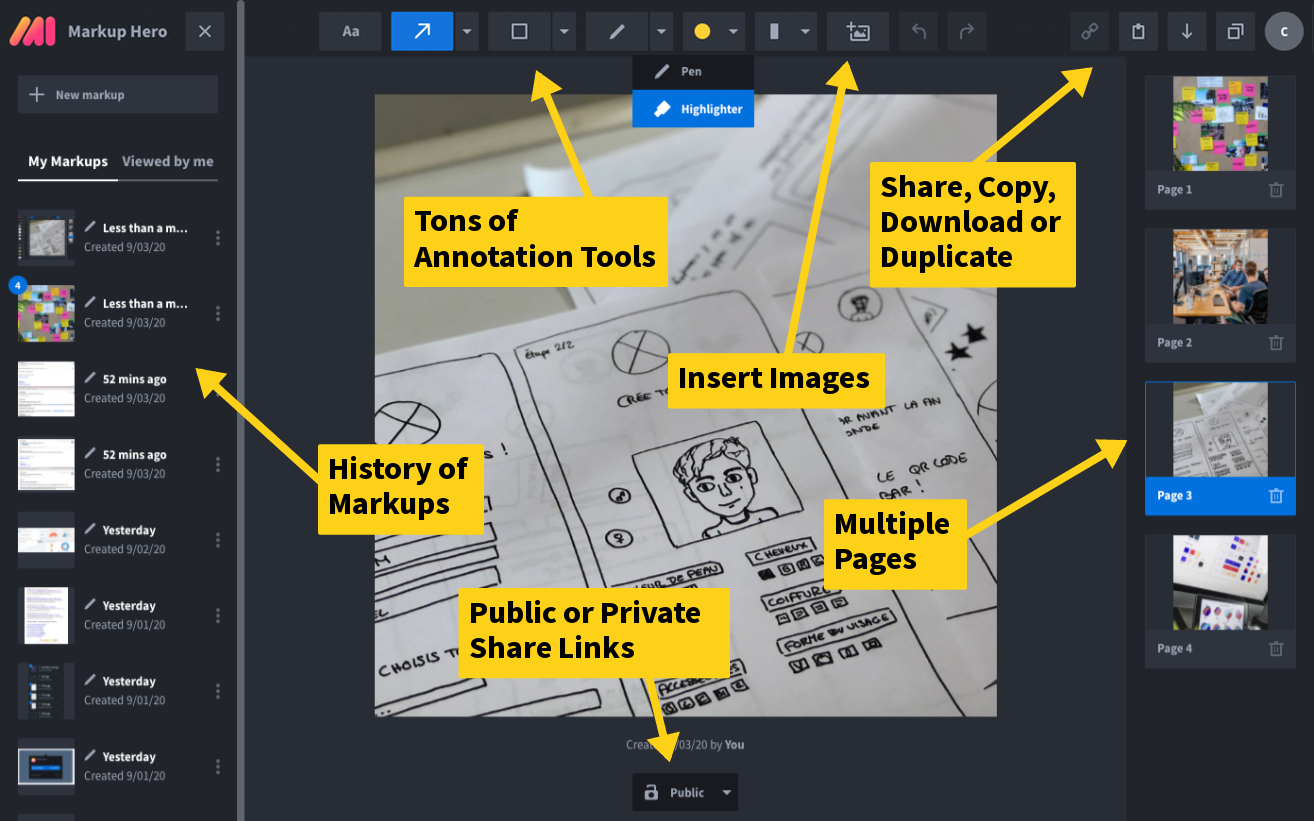
Here's some of the things you can do with Markup Hero:
- Screenshot or upload images, PDF's, Google Docs/Sheets/Slides
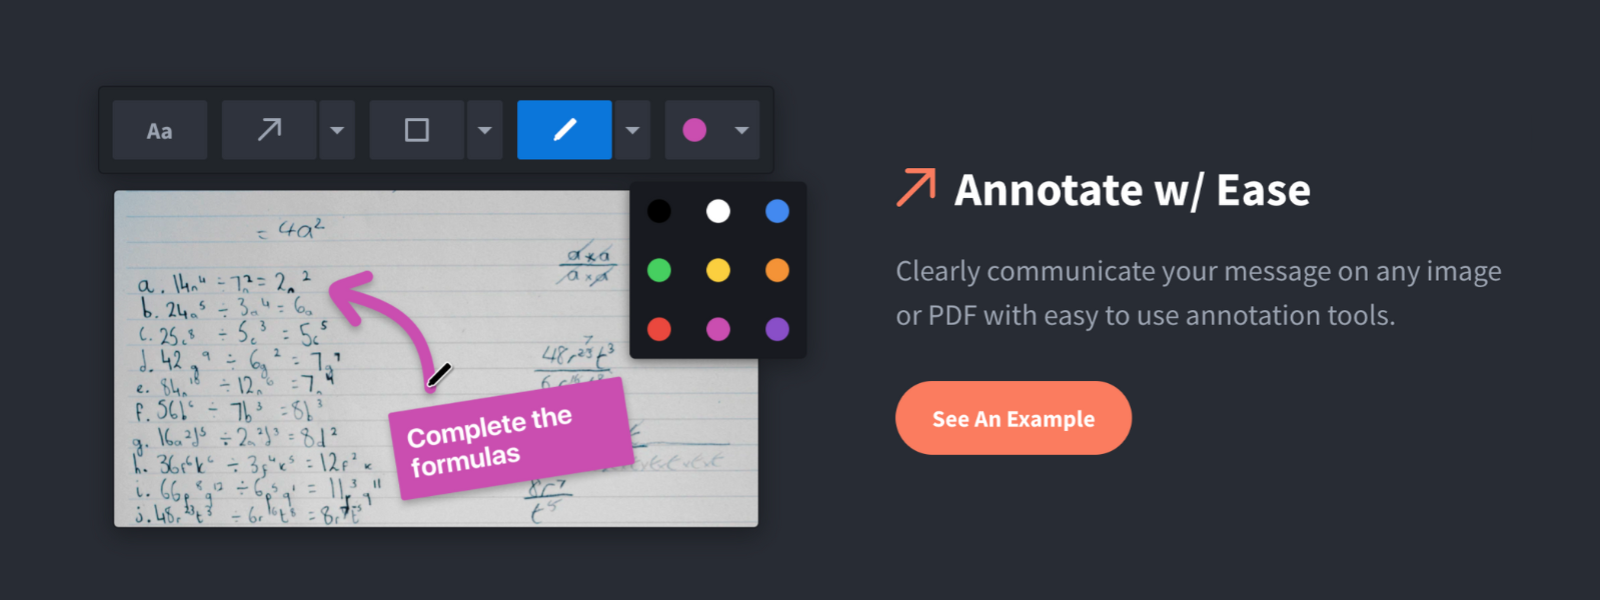
- Add annotations and markup like arrows, text boxes, highlights, colors, ovals, boxes and so much more
- Organize your screenshots and easily share with friends
- Set permissions on screenshots so they are private to you or public for friends
- Add multiple pages and combine screenshots into a presentation
Final Words
Your Dell laptop or computer may feature a number of ways to take a screenshot, but if you really want to use a variety of rich options that lets you capture a screenshot and more, Markup Hero would be your go-to application. With the help of this tool, accessing, editing, annotating, and sharing your snapshots seem effortless. Try it for yourself and see if it’s worth your time.