
Here's a great Markup Hero hack I've been using lately. I often find myself wanting to send several images via a single share link to someone. This article explains how to do it and why you would want to.
Here's a use case:
- I'm on a customer service chat with REI regarding some clothes they sent me that were damaged
- I take four pictures of the damaged clothes on my iPhone and save them to my downloads folder on my Macbook
- I've got my iPhone photo preferences set to take pretty high res images so the pictures are huge, about 5-6MB each
- Although Markup Hero has an 8MB limit per image, I really don't want to send 6MB files in a customer service chat, even if I'm just sending a single Markup Hero link
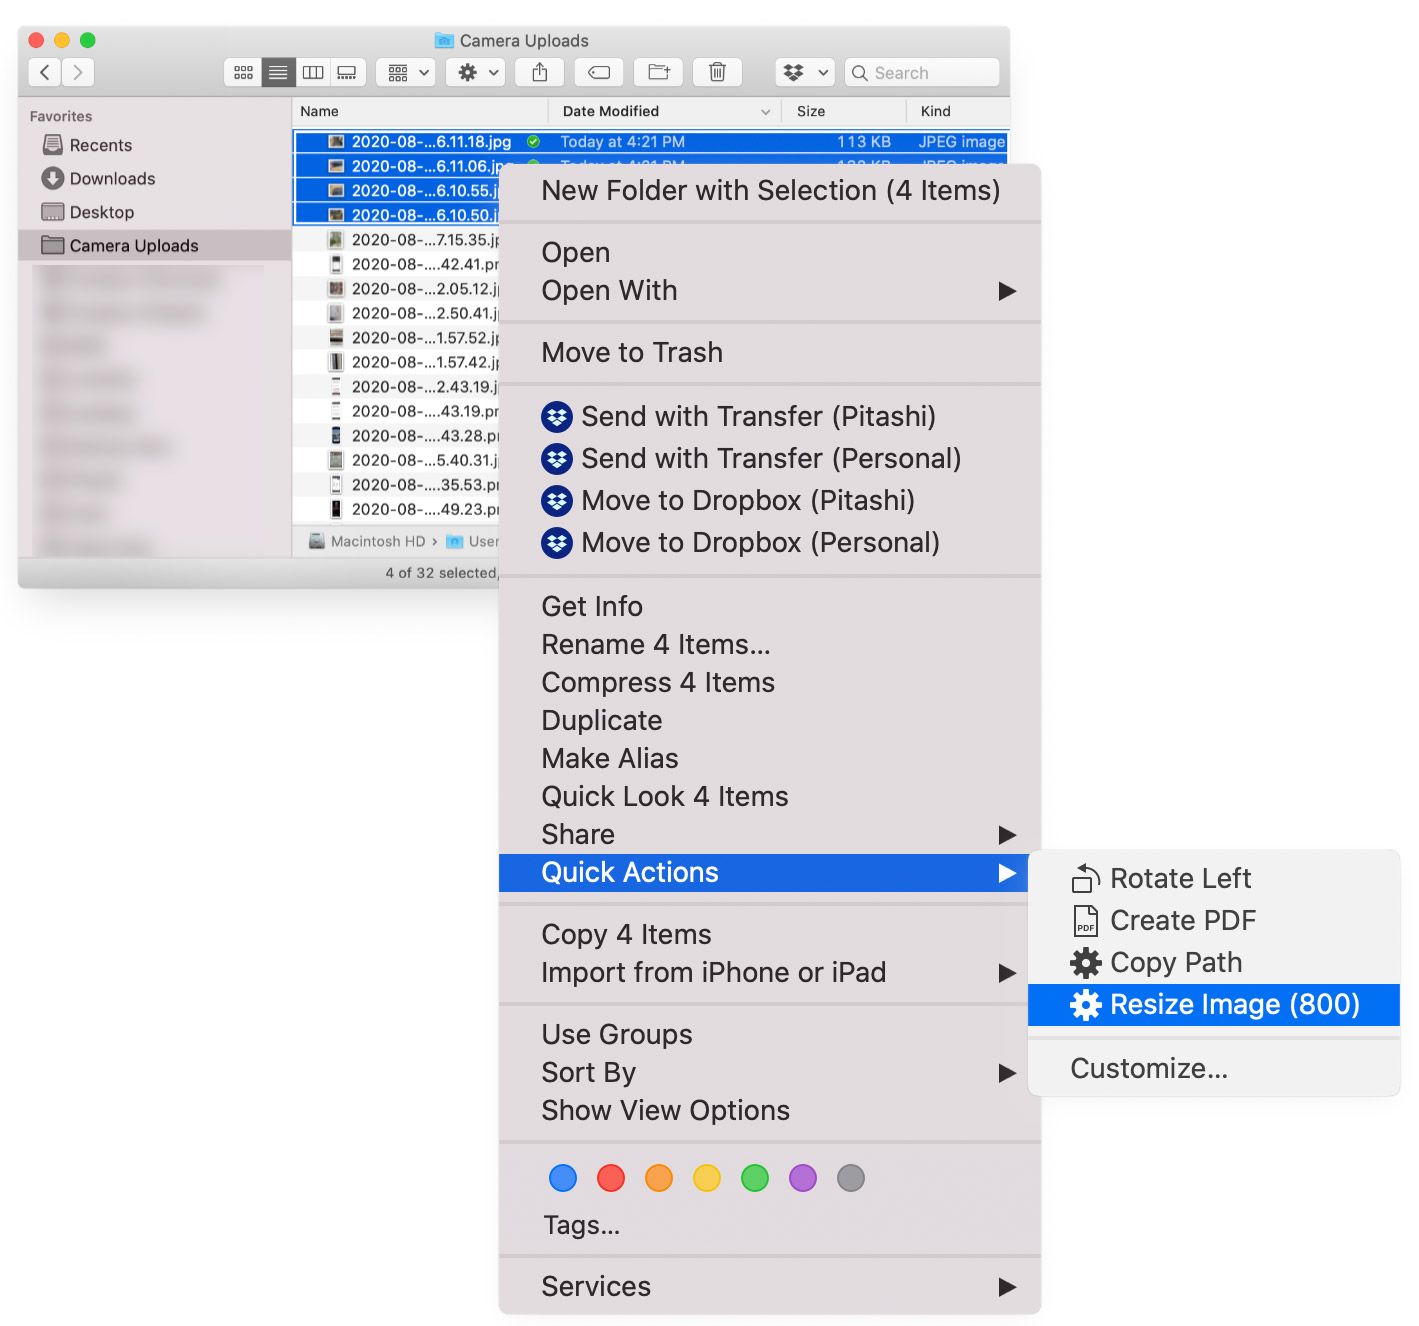
- I go to my Mac finder > downloads folder and highlight the four files
- Right click and choose Resize Image (800px) which automatically compresses each image to 800 pixels, about 100K each (down from 6MB each)
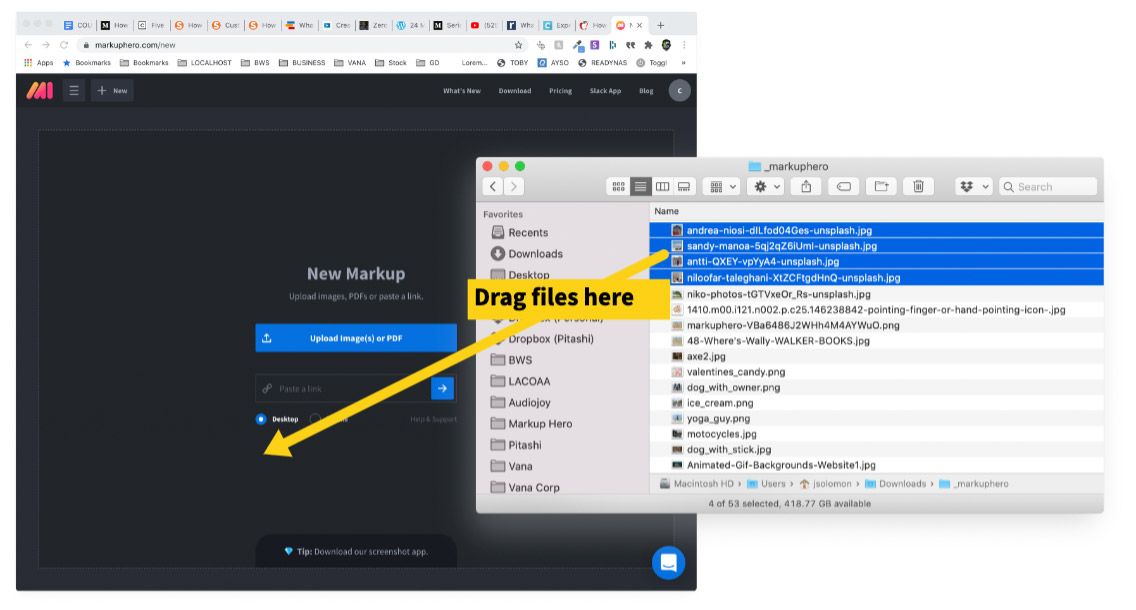
- I drag the four files into Markup Hero and copy the share link
- Done.
Now I just send the share link to the REI customer service person and in one click, they see all my images. Fast and easy.
As an optional extra step, I could also use a tool to quickly remove backgrounds to the product images before uploading them to Markup Hero. This can help draw attention directly to the damaged items themselves or place them in a setting more suited to the use case. But for this example, the original product shots work fine.
How to Setup Image Resizing with One Click from a Folder in Mac Finder
Of course there are a ton of ways to resize images on your Mac. You can use Photoshop and a number of other design programs and even Mac's built in Preview app. But it takes time and you have to do it one by one or setup a batch process. Not fast. The method described below will take you 5 minutes to setup and then re-use it over and over again. Here's how to do it.
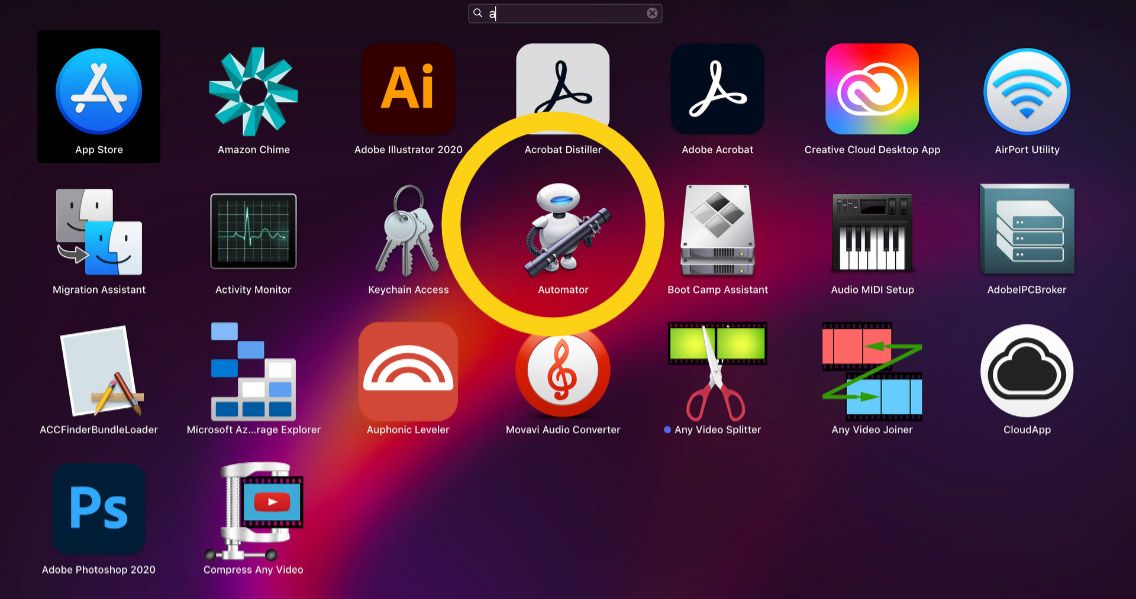
1 — Launch the built in Mac program called Automator (it's in the Applications folder, or press CMD + Space Bar and just search for Automator)
2 — Once open, Automator should automatically create a New Document, if not just choose to create one
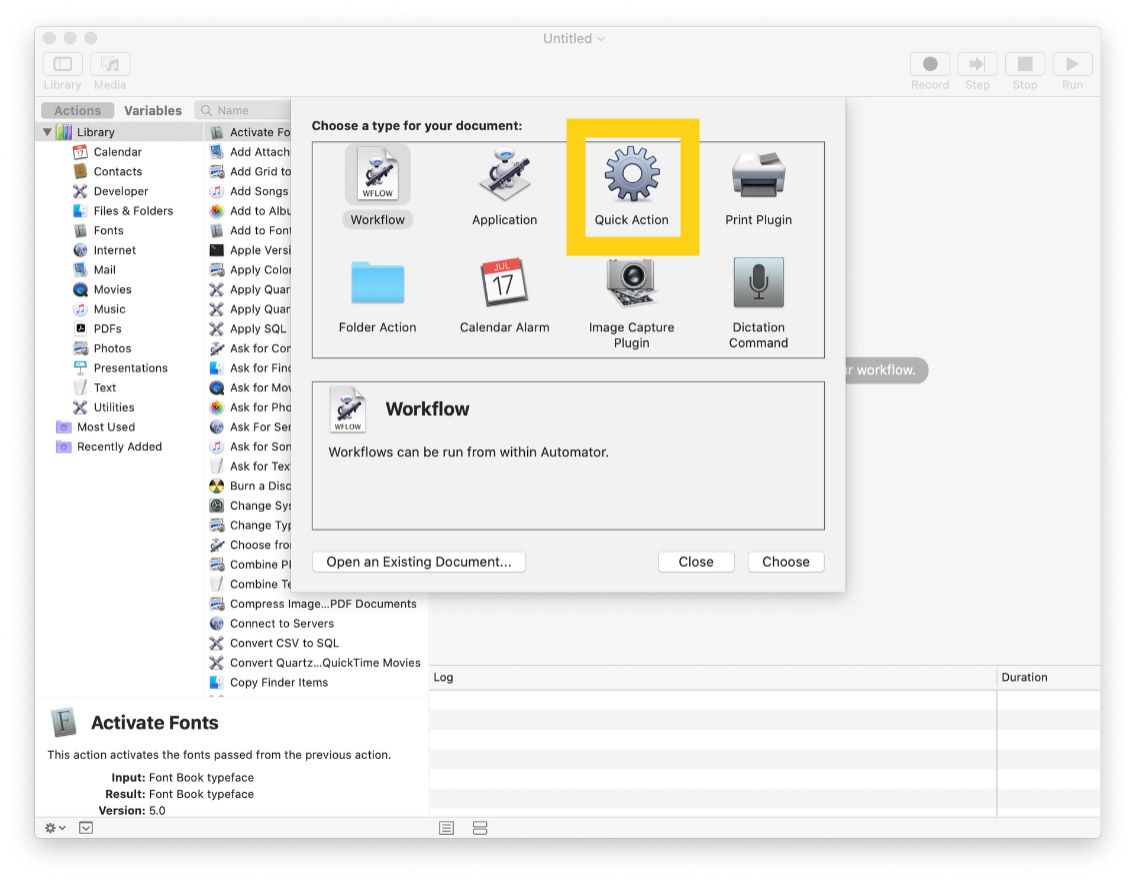
3 — Choose the Quick Action document type
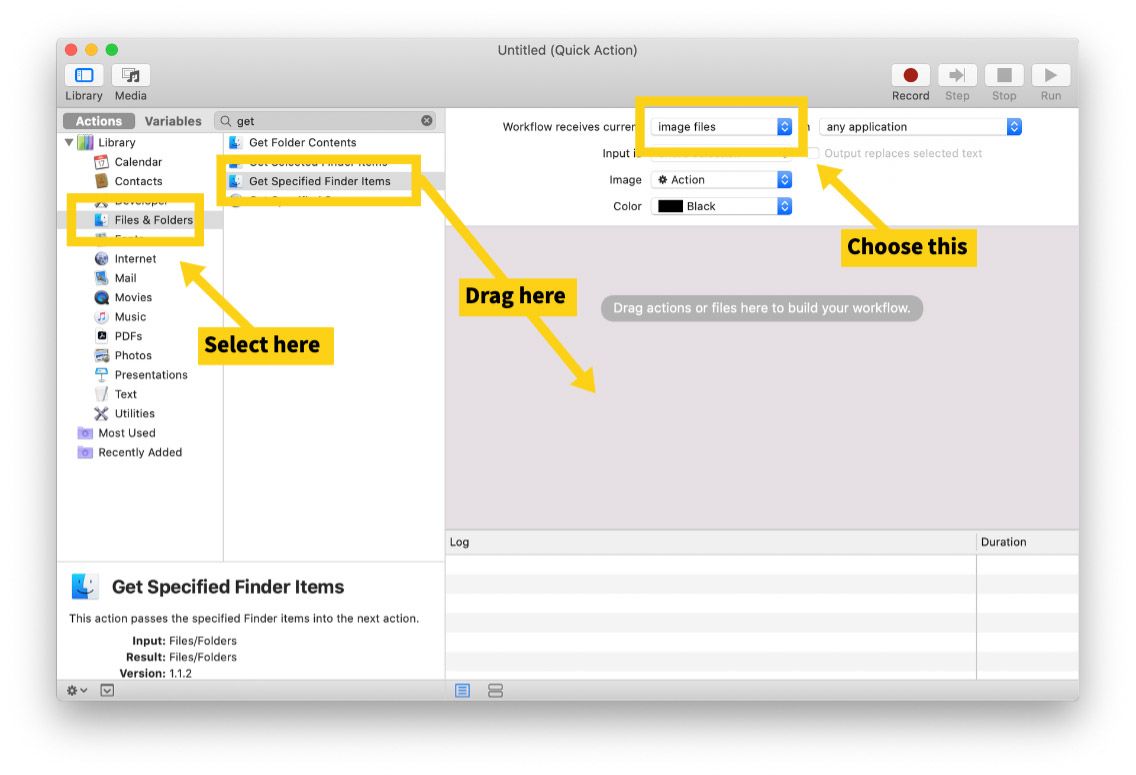
4 — Choose Image Files in the workflow receives dropdown, select Files and Folders in the Actions sidebar, then drag Get Specified Finder Items to the workflow area.
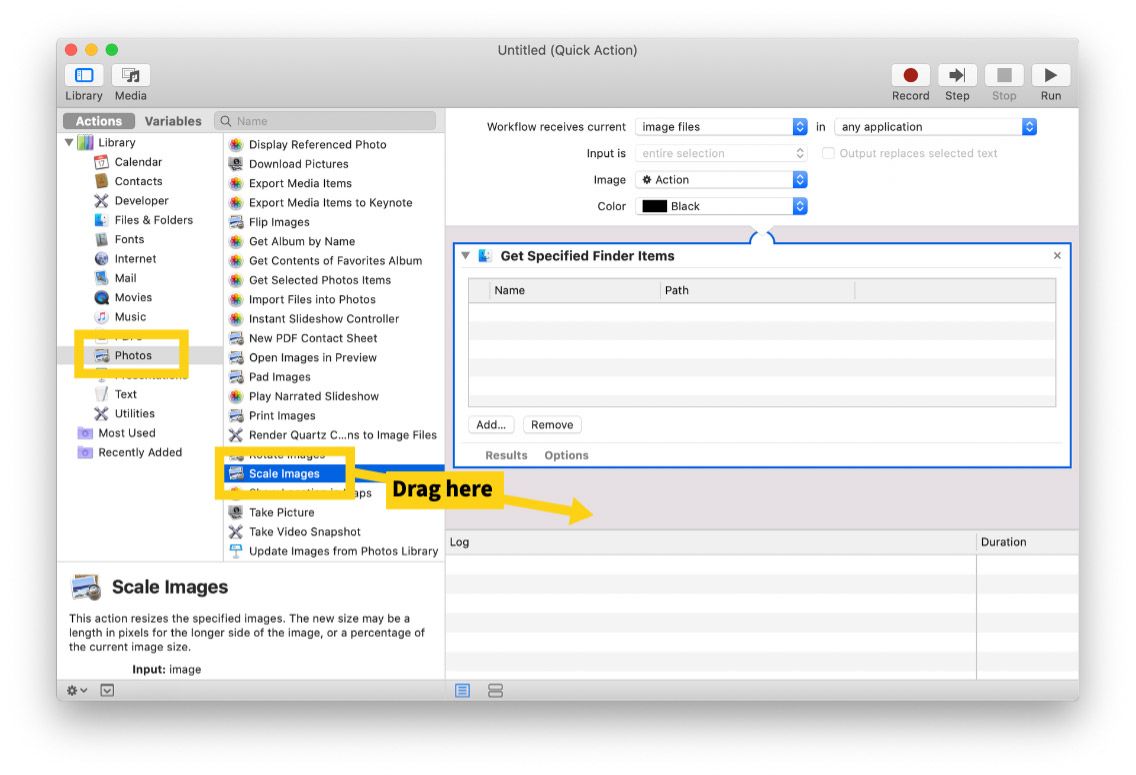
5 — Select Photos in the Actions sidebar, then drag Scale Images to the workflow area.
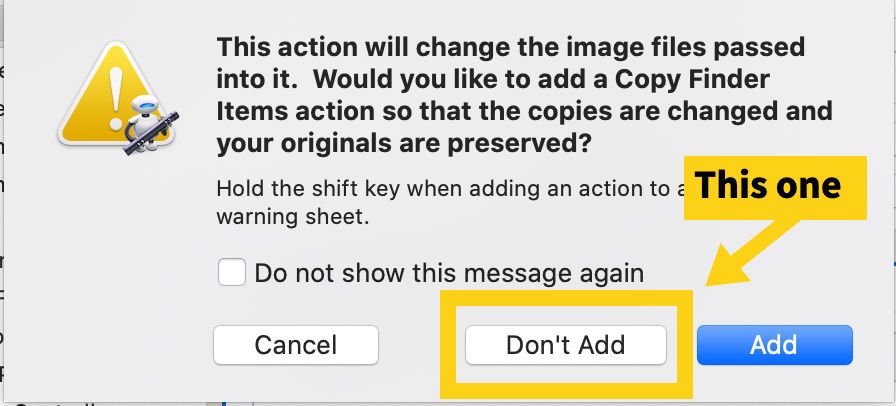
6 — Automator will pop a confirmation window you to add a Copy Finder Items Action to give you the option to save a copy of the file in a separate folder. Choose Add if you want to do this, or choose Don't Add if you just want the images to update and overwrite themselves; that's what we choose.
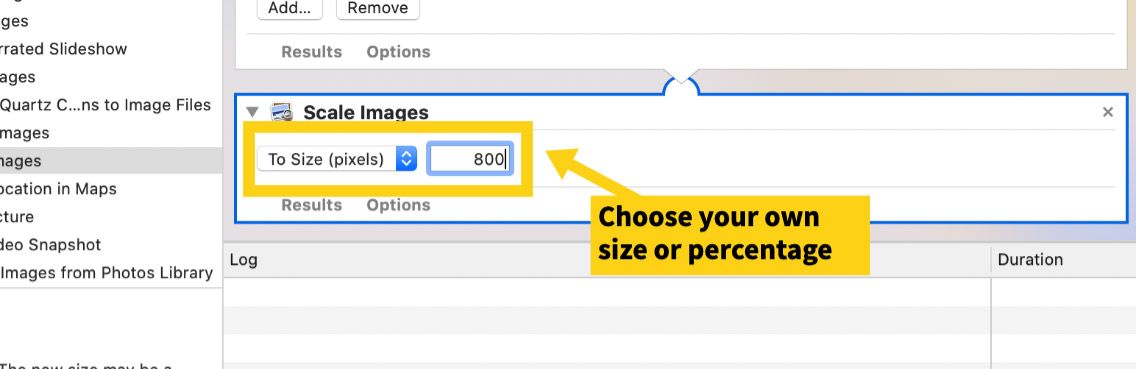
7 — Then in the Scale Images action panel, type the width that you want to resize your images to. We chose 800, but you can make as many of these as you want for different sizes.
8 — Then save the automation by going to the Automator menu bar, select File -> Save, call your new service Resize Image (800) or whatever you like, and click Save.
9 — To use your new automation, just go to finder, right click on the image or group of images you want to resize, choose Quick Actions -> Resize Image (800)
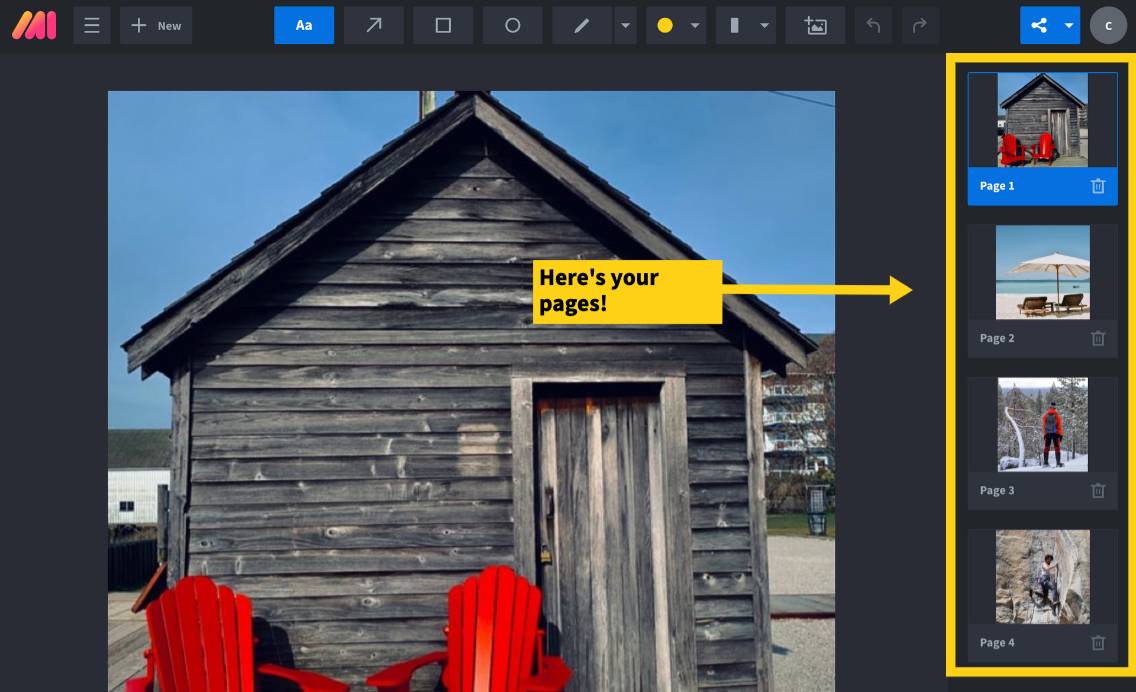
Create a Multi-Page Markup with Your Newly Sized Images
Now that you've got the quick resize automation setup, now just highlight any images you resized and drag them into Markup Hero to create a new markup with each image as a separate page. Copy the share link and send it to whoever you want.
One and done!