
Due to the COVID-19 pandemic, our generation is heading towards a virtually inclined work platform where everyone is completing their work online. Along with the growing number of people using the internet, technology is improving every minute, making our everyday life much easier.
PRO TIP: Click Here to Skip Directly to our Recommendation!
Many of the programs that are needed to work on electronic devices may be complex to a lot of us. Annotating a PDF is such a task that is confusing to many since we are not fully aware of the functions in an annotating app or website. While some websites may seem tricky to use, others offer an easier way to get the task done in minimal steps.
To help you get familiar with the many annotating applications, we are here to talk about Microsoft OneNote and how you will be able to annotate your PDF with this app in a step-by-step guide. Markup Hero is another great alternative to use for annotating PDF files, taking screenshots, and many more tools for your virtual projects or presentations.
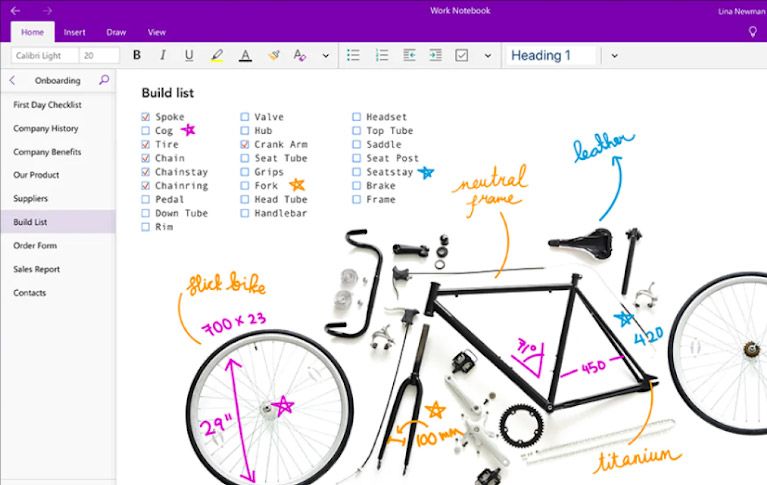
About Microsoft OneNote
A vital productivity tool for schools and businesses alike, Microsoft OneNote is a division of the Office 365 line of applications. In this application, all your notes are gathered and compartmentalized into different notebooks, each of which consists of separate sections. The application is suitable for a variety of digital formats such as simple text and pinning multimedia documents.
OneNote comes with a range of benefits. For example, the application ensures the security of sensitive information by taking security measures such as providing a function to password-protect separate sections. Along with this, the application automatically locks any password-protected sections if the app remains inactive for a certain amount of time, so you can rest assured that all of your sensitive data will be safe.
Side by side, OneNote’s ability to be integrated with other software also makes it an extremely efficient tool. You will be able to send any piece of information in your emails from Outlook directly to OneNote and vice versa by simply synchronizing one application with the other.
Microsoft OneNote also allows collaboration in real-time. This function allows the notebooks to be shared amongst multiple users for editing or viewing. Furthermore, the application automatically saves any work done alongside enabling you to view all editions made in the ‘history’ tab, and also restore any file version you want.
Furthermore, Microsoft OneNote offers a free edition of the application, where you will get 15 GB of OneDrive memory, thus giving you enough space to create and sync an unlimited number of notes.
OneNote PDF tips
The new version of OneNote comes with extra functions such as the dark mode option as well as the newly integrated sticky notes. To fully take advantage of these new upgrades, we have accumulated a list of tips you can use to get your creativity and productivity out there.
The first one on our list is the OneNote PDF-to-text with OCR. This function enables the application to read text from any image, where the text can be easily copied and pasted separately. To do so, simply follow the instructions we are about to mention:
- Right-click on the image and select the option that says ‘Copy Text from Picture’. You may also choose to use another option which says ‘Copy Text from All the Pages of the Printout ' if you wish to copy all the text on the PDF at once
- Next, all you need to do is simply paste all the information on a separate document, and you are good to go!
For those who prefer listening over reading, OneNote has your back with the applications Immersive Reader feature. You can turn this feature on by following the points mentioned below-
1. To activate this feature of the OCR on OneNote, open the View tab and select the Immersive Reader option that you will find there
2. The printout of your PDF will be saved on the View tab, and after completing the first step, you will be guided to a new window where you will be able to listen to the audio version of your PDF.
Another effective use of this application is that you are given the benefit to navigate the PDF in OneNote, which can be done by following the next few steps:
- Import the PDF using the Printout choice
- Afterwards, search for any text inside the files but do keep in mind that you cannot carry out this step without completing the aforementioned one first. Upon searching for the specific text, you will find what you’re looking for.
Annotate a PDF in OneNote
Virtually annotating a PDF is free of cost and not troublesome at all, unlike having to print it out and editing all the information by hand. Microsoft OneNote also gives its users the privilege to annotate PDFs on any device of their choice.
Moreover, you may also draw on the PDF or make hand-written notes on them provided that you are using a touchscreen device. Follow the steps given below, and you will learn PDF annotation on Microsoft OneNote in no time!
Step 1: Import the PDF File
Import the PDF file to OneNote either by dragging and dropping the PDF file or by selecting the File option located under the Insert menu.
Step 2: Attach the File
After completing the first step, you will have three options. You can either upload to OneDrive or then insert a link or opt to attach the PDF file which will then be saved to OneNote.
You can also insert a printout to the file if you want. This will scan the PDF and convert it into an image for you to annotate. However, we would recommend you to attach the PDF, in case you are not using OneDrive. But if you are using this amazing app, do make sure you save the PDF as this will allow you to upload it easily.
Step 3: Scan the PDF File
To annotate the PDF, you will first have to click on the Insert menu, below which you will see different options. Click on the option which says printout to scan the PDF and hence create an image.
Step 4: Add Extras (If You Want)
Afterwards, click on the draw menu, and a variety of options will pop up which are there to help you annotate. You can highlight, write comments, draw shapes, etc. If any of the shapes seem imperfect, you can click on Ink to Shape to alternate said shape and make it look more refined. Since it is not possible to export any PDF from OneNote, we would advise you to save the image that was produced before closing the application.
Step 5: Share Your File (Optional)
Should you wish to share the image with others, there is a Share option located in the upper-right corner of the application which enables you to share your annotated content.
A Simpler Alternative with Markup Hero
Although Microsoft OneNote is a convenient app for notes, there are certain reports and a few drawbacks that have been brought to the surface recently. For example, one user reported that the annotations and PDF have no connection, and so, when moving the printouts, the annotations got scrambled up.
Side by side, a few Mac users reported difficulties in adding documents even when it had been created in other Microsoft products. In addition to that, an Office 365 beginner user may find the OneNote annotating tool a bit complex as there are various steps that one needs to follow before they can annotate the PDF.
With that being said, if you are looking for a simpler and better alternative by which you can annotate your PDF, we recommend Markup Hero. Markup Hero is an effective and free application that enables you to take screenshots and annotate PDFs, images, and websites.
Markup Hero provides a reliable platform for anyone from content creators, to digital media marketers, and even sales and customer service providers.
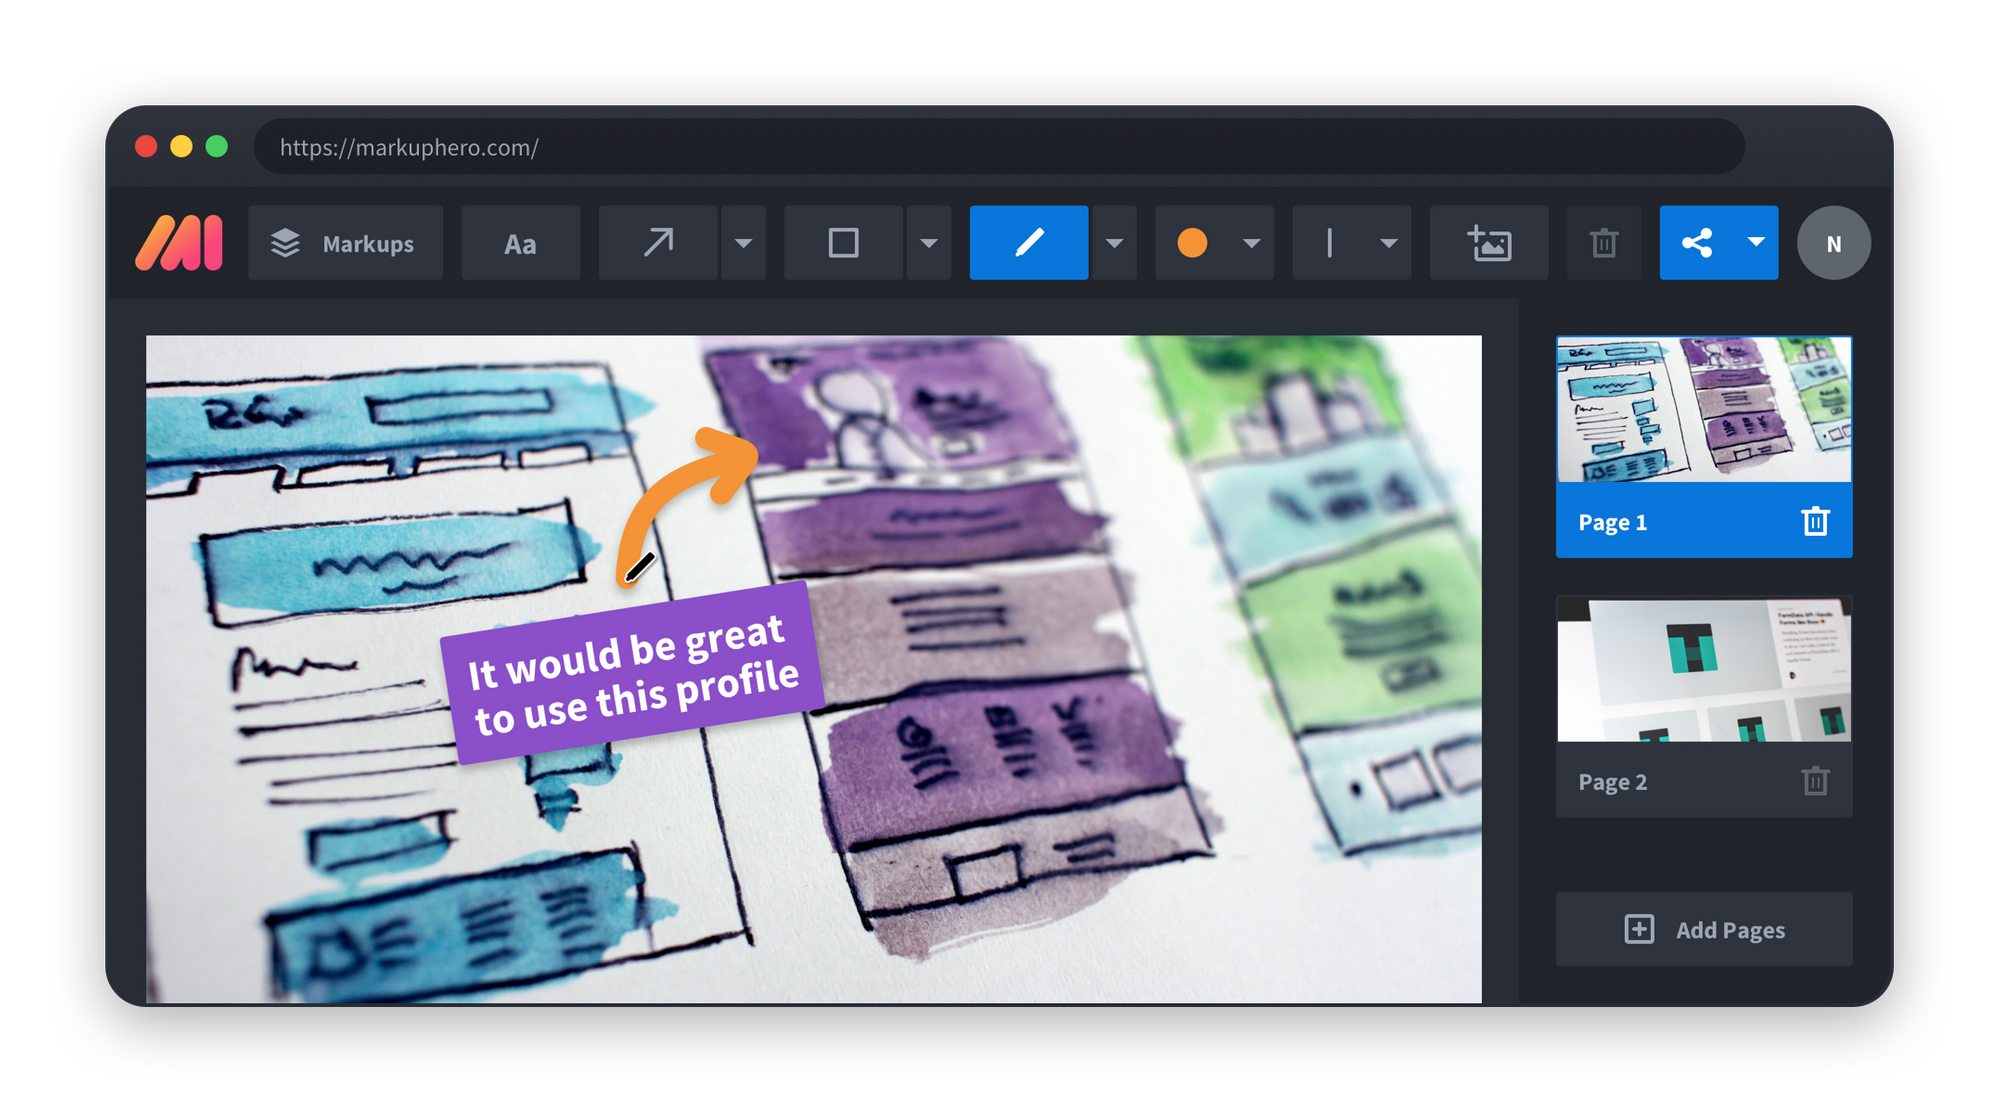
This application allows you to capture and share ideas using the screenshot app and image/PDF uploader options. Markup Hero also enables you to communicate clearly on any image or PDF. Furthermore, it allows you to swiftly take screenshots with the desktop app. In this application, you will also get to choose whether you wish to share a link, copy an image, or immediately add a markup.
Markup Hero also allows you to upload an image or paste a link to your chosen website, which will then be converted to PNG for you to make corrections to anything you want. The application also lets you add text, shapes, or drawings. With the Full History & Editing option, you can view your history as well as edit your markup along with viewing other ones.
This remarkable application delivers a superfluity of options to get your precise message across and to bring forth your creativity by using the annotation tools such as the arrow tool, and a variety of colors, highlighters, blurring tools, and many more.
Markup Hero also gives you the facility to directly integrate with Slack and Google Drive. This option enables you to conveniently annotate Google Sheets, Google Slides, and Google Docs, along with the PDF/images that are shared on your Slack channels.
Furthermore, the privacy settings give you the opportunity to make the markups public (by sharing the link) or private. Not only that, but Markup Hero also helps you stay organized by arranging all the corrected documents with tags, a viewable history, and personalized privacy settings.
Markup Hero is made for Mac, Windows, Linux, and Chrome. It can be used on both PC and mobile. This application is simple to use, and it is your best bet given that you are allowed to use the application for free. There are 3 plans given that you may choose from. These are Sidekick, Hero, and Superhero.
While the Sidekick plan lets you use Markup Hero for free without having to sign-up, the Hero plan will let you keep up to 10 markups every month, that too for free. However, if you wish to upgrade your plan to something that will give you access to all the tools available at Markup Hero, we would recommend you to purchase the Superhero plan which comes in at a price of only $4 per month.
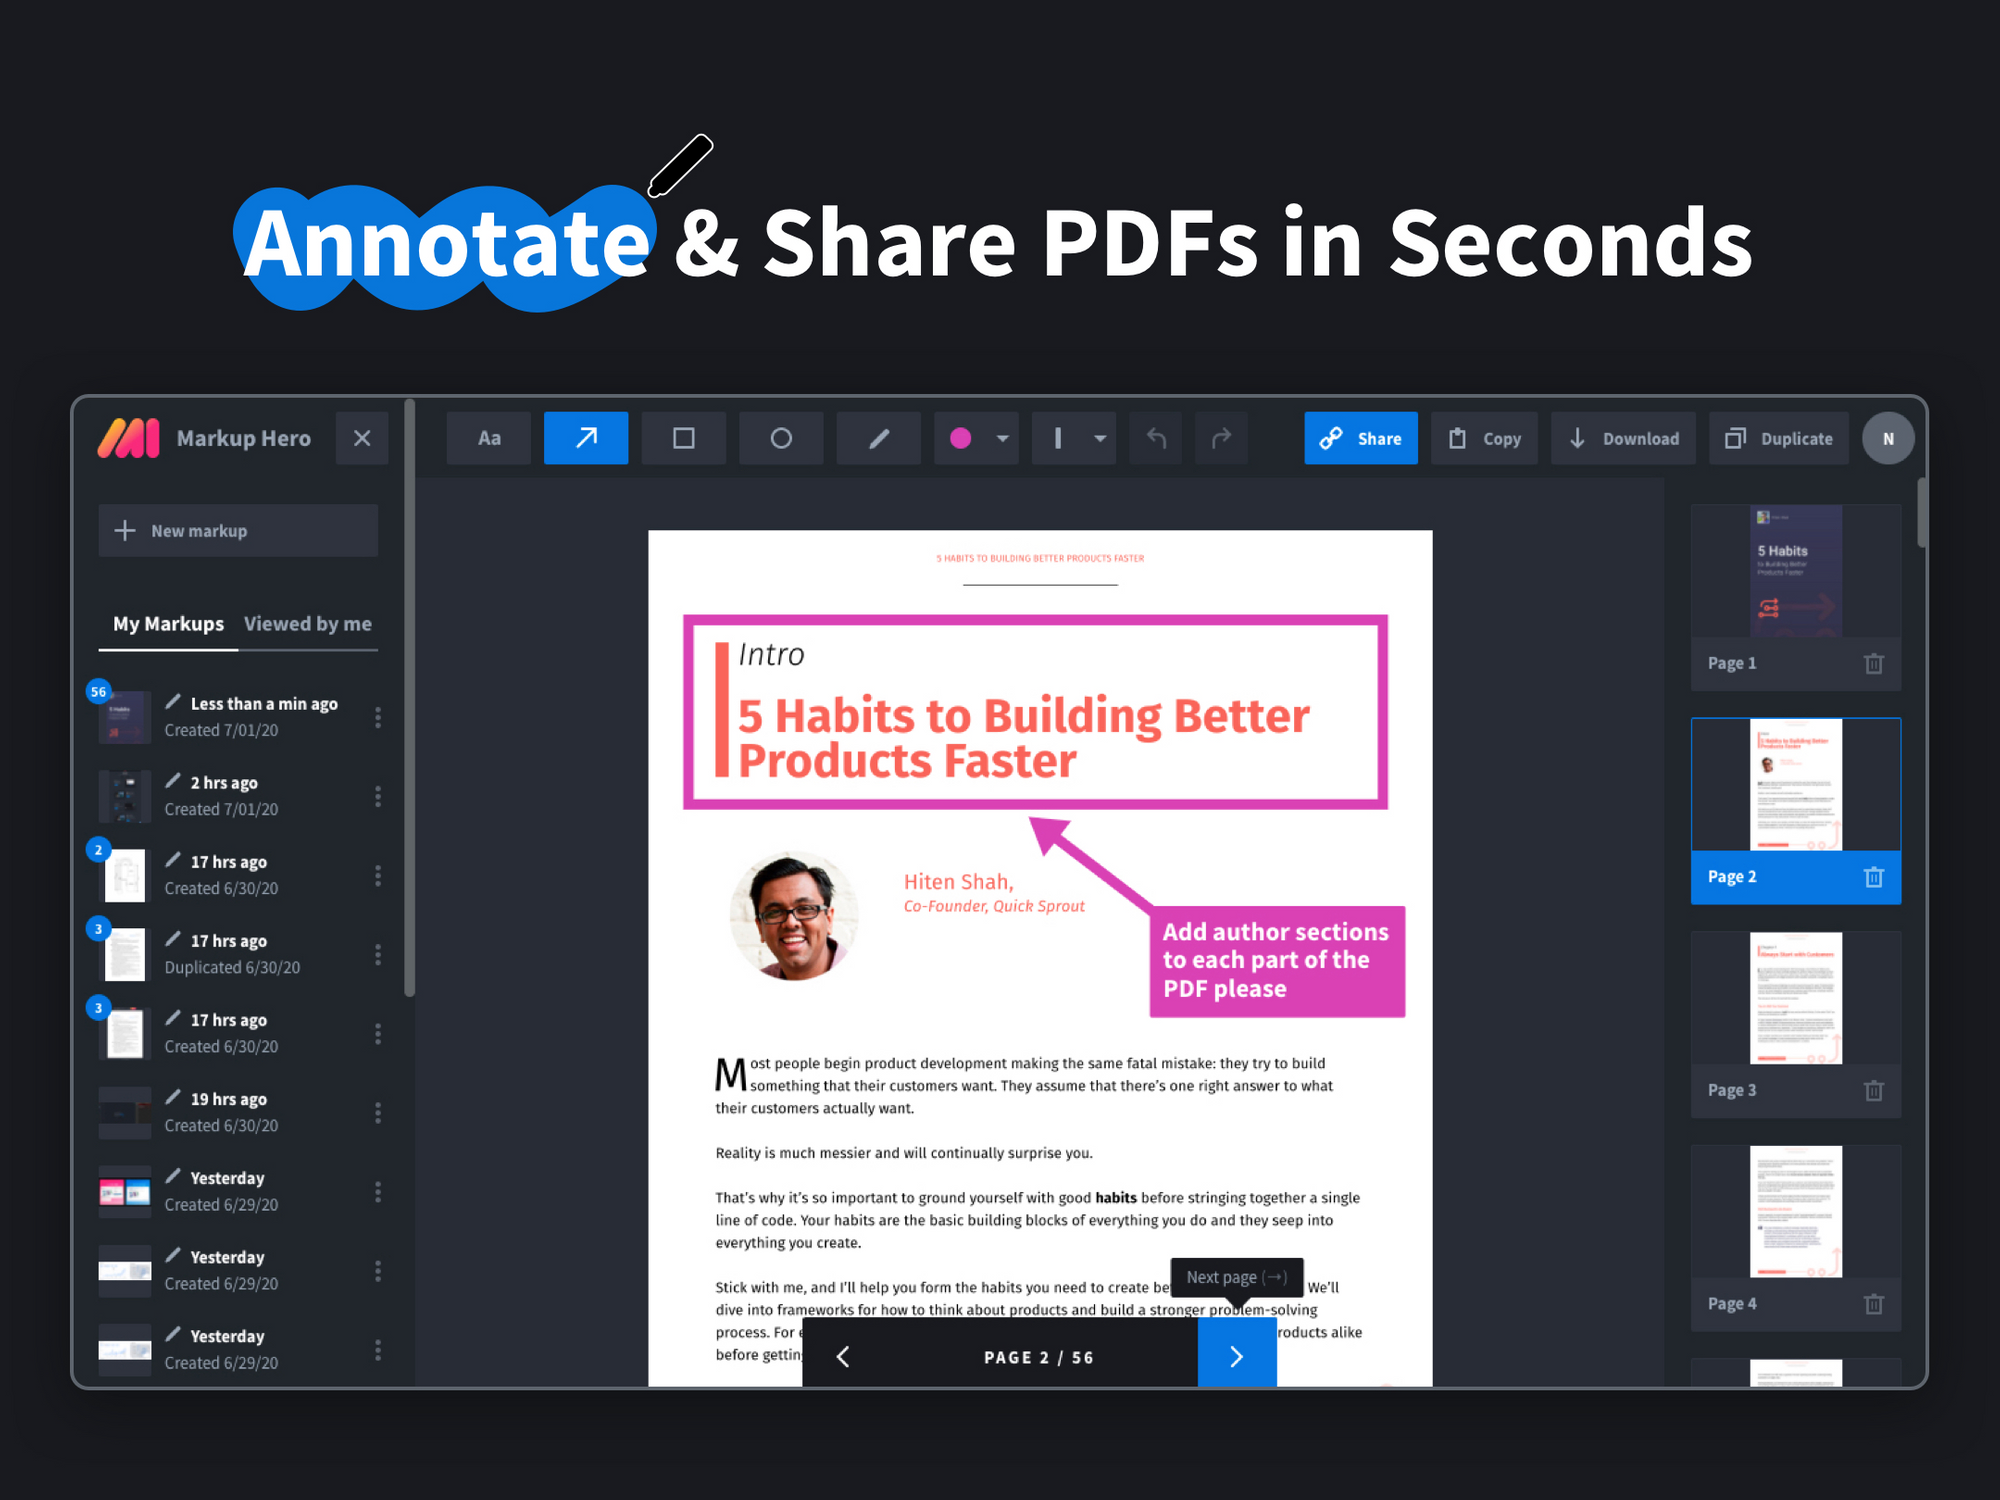
Annotate PDF Using Markup Hero
The steps to annotating your chosen PDF by using the Markup Hero application are very precise, short, and simple to learn.

- Start by uploading a PDF. You can also upload the image(s) or even paste a link.
- Once your PDF file has been uploaded, you can annotate it any way you want by adding texts, shapes, drawings, and/or images to get your specific message across. Markup Hero annotations are effortless due to the plethora of detailed tools that they provide.
- When done, you can share a link, be it of the entire PDF or even that of a single page. You can then paste this link onto an email, SMS, or any program you want.
- Should you wish to take a look at your previous work or documents that have been shared with you in the past, simply check out the History tab in the application and you will find what you are looking for.
Final Words
If you are to edit or annotate PDFs virtually, then you must know your options. For annotating PDF files and highlighting important sites to even screenshotting images and webpages, our recommendation would be to check out Markup Hero, as they provide a range of services that cater towards helping clients create a brilliant virtual project.